Friday, April 15, 2011

A Circus in-a-Box

Hi all! Becky here today to share this silly little circus shrine I made from the Peek-a-View Box! I am on a total vintage circus kick right now & I just couldn't resist letting it spill over into some CC&M products & show you that you don't have to use these products strictly for what they were intended!
 The interior of box has tissue paper glued to the acetate & an old image of a circus poster from Graphic 45.
You'll notice that the unicycle girl is also holding a lollipop from CC&M. I colored it in with copics & then added some glossy accents to the candy portion.
I used some fun ribbon along the top of the box & some odds & ends at the very top. In order to make it look like one of the circus cars, I added the bottle caps with clown images from Graphic 45 inside.
 For the back, I used another poster image from Graphic 45.
The inside of the box is empty & all the edges are glued together with the Red Tacky Tape. I decided to make this more of a "shrine-type" box rather than a functional gift box.

That's it for today!
See you soon!


Thursday, April 14, 2011

A Happy Easter Card

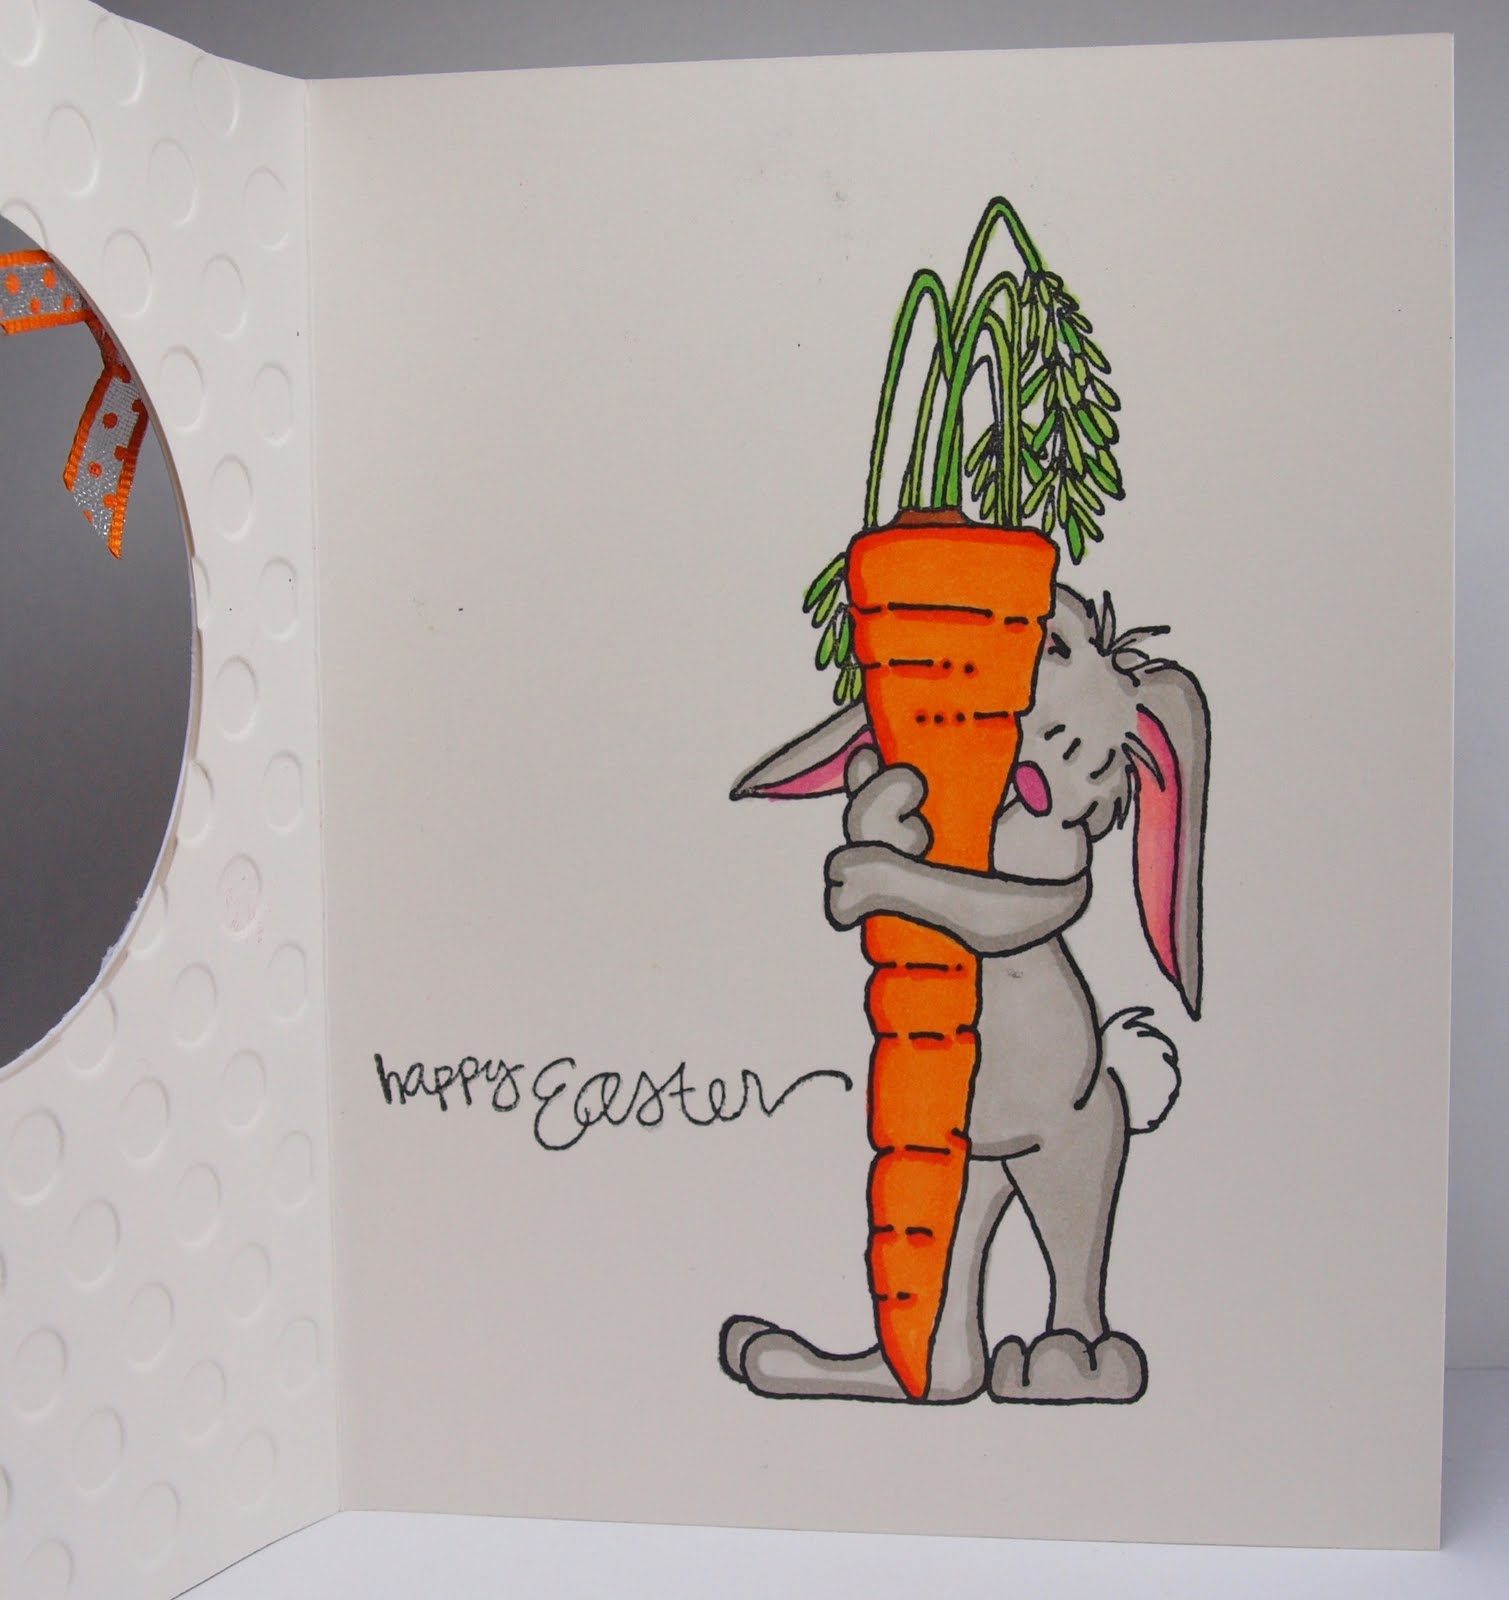
Hi! It's Nora Anne posting today, for the first time as a Die Cut Diva! I'm so happy to be here! My card today uses one of the fabulous Circle Window A2 Cards with mat  using Neenah Smooth cardstock in cream. I just LOVE this cardstock, so smooth and great for coloring with Copics!
My little bunny peeking out of the hole, along with the background stamp is by Inky Antics. I embossed the card base with a Sizzix embossing folder, layered some gingham cardstock underneath and colored my images with Copics.
Have you been by Creative Cuts and More lately?! There are new items being added regularly, including some really fun assortments that I'm sure you'll love!


Thanks for visiting today, I will be back next Thursday with another project, but be sure to stop by regularly to see what the other Die Cut Divas are up to!
Have a Happy Thursday!

Wednesday, April 13, 2011

How do you feel about Butterflies?

 I have this tiny little addiction to them  LOL  Right up there with owls and squares in my scrapbook room!  :) Hi Everyone!  It's Noelle posting today! I have been a busy little cutter lately!  I am making assortments!  You are going to LOVE them!  We started with Butterflies!  
I grabbed an A2 card and decided to use a sketch from a {ippity} challenge over on Split Coast Stampers
I used a butterfly in recycled book pages and vellum.  I LOVE layering them!  The book print wasn't working for me with how bright it was so I smashed it into my ink pad. 
I added some bling from a Hero Arts stamp set and a little trail.  The sentiment is from Just Wanted To Say by {ippity}.  The pattern paper is a scrap from My Mind's Eye!  I have never met a scrap I didn't like!  I have drawers of them and use them on every card I make!
I also used some Killer Red Tacky Tape to attach the butterflies!
Thanks so much for stopping by today!

Tuesday, April 12, 2011

Easter is just around the corner...

Hi Everyone!  Fern here, and this is my first post as a Die Cut Diva and I'm excited!!  I'm sharing this cute little Peek-A-View Box from Creative Cuts and More..  I decided since Easter is just around the corner I would make it into a little Easter Box for my granddaughter Savannah..  I used Berry Sensation Bazzill Smoothies Cardstock and embossed it.. It's put together with Killer White Tear-able Tacky Tape to make it strong so it will hold all of her yummy Easter candy...

One of the nice things about this Peek-A-View Box is it's small enough that it doesn't take a lot of decorations and you can pretty much decorate it with things from your stash, like I did...  Here's what I used:
Creative Cuts and More ~ Peek-A-View Box in
  Berry Sensation Bazzill Smoothies Cardstock
Stamp ~ Stampin' Up
 Stickers, flowers, rhinestones ~ from stash
Curled Ribbon
Bow from little girls hair barrette 

Top view

 Be sure and check out the other boxes, cards, and die cuts over at Creative Cuts & More..
Have a wonderful day!!
Hugs!!!

Monday, April 11, 2011

Did Someone Say "Spring"?

Happy Monday!!!

I hope you had a great weekend! I stamped a ton over the weekend and have a fun Standing Pop Up Card to share with you today!

Here it is open.

How fun is that??? It features a new Dustin Pike Dragon, "Pogoin' Dragon" from High Hopes Stamps.

I started with a Standing Pop Up Card from Creative Cuts & More die cut from Pear Bazzill Canvas Tuxtured Cardstock and decorated it with High Hopes stamps and my new Fiskars grass border punch.

Here is how it looks folded flat and ready for mailing!

Stamps:
Pogoin' Dragon by High Hopes Stamps
Say Spring? by High Hopes Stamps
Perriwinkle flower by High Hopes Stamps
Paper:
Standing Pop Up Card from Creative Cuts & More
Neenah white cardstock
Bazzill Prismatic Baby Blue Dark cardstock
Ink:
Memento Tuxedo Black dye ink
Copic Markers
Other:
Fiskars Grass border punch
pop dots

I hope you enjoyed my Standing Pop Up Card! Have a great week!!!

Kristine

Saturday, April 9, 2011

Do You Like Tags???

I have some fun tags I put together to share with you today.
I am always in need of some fun ideas to add to gifts or a  special way to share a message to someone special.
Creative Cuts and More has some great die cuts that work for this very need.
Here is a view of the two I put together quickly to share.
I started with the Slash Pocket with Tag #05
one is in Bon Bon -pocket Bazzill Criss Cross ,Tag - Cocoa - Bazzill Criss Cross
the other is in Bazzill textured pocket - Bubble Gum - Bazzill Criss Cross
 Tag - Pajama - Bazzill Criss Cross

 For this first one I used one of my favorite Tilda images and luggage stack- both from Magnolis.
The images were colored with Copic markers- and fussy cut, and pop dotted to the front of the pocket holder.
Thought it needed some faux stitches to add some contrast.
Ribbon from my stash
Handmade flowers from my stash of Cricut and punch designed ones.
This is one of my favorite so far.
A little girls heart 
must be wide and deep
to hold all the things
that she likes to keep
I got some of this great paper from Prima- just added a border cut from a design.
I decided to use a 

Scallop Oval Frame #01 - Large

 as a tag inside the pocket.
Frame was painted with some H20 paint to add the sparkle and shine.
Simple ribbon from my stash
I love these frames and find so many uses for them.
This is just a sheet of white card stock mounted to the back and decorated with a string of pearls and a handmade flower.
One last view of the frame made tag.
Have you taken time to browse through the Creative Cuts and More store
Would love to hear some of your ideas of using other dies to make a creation- like I did with this frame.
Thanks for popping in and most of all for leaving a comment.
Our team appreciates all of your visits.

Friday, April 8, 2011

Time For A Baby Shower!

Hi friends, Dawn Lusk here sharing this darling Baby Shoe from Creative Cuts and More. It seems I know at least 5 that are expecting, several with their first baby, so I know I'll be attending some showers in the near future! Don't these sweet shoes make excellent goody containers?!

This one is made from Bazzill Smoothies, Guava Sensation that I dry embossed. It's so simple to put together, there is a tutorial here. I used Killer White Tacky Tearable Tape, that stuff is awesome! A little ribbon and a brad and you have the sweetest decoration!!

For extra fun, make a placecard for the head table or if you're feeling extra crafty...for everyone attending!

Thanks for stopping!
Dawn

Thursday, April 7, 2011

"The Crazy Bird Lady" does it again!

Hi all! Becky here to share another FABULOUS project from my sister, a.k.a. Kim, "The Crazy Bird Lady!" She's still cranking out these amazing pieces inspired by her "slight" obsession with birds (& the book "Delight in the Details")! This time around, she used the Schoolhouse Picture Frame as her base for this gorgeous tag!


She traced the schoolhouse die onto a piece of needlepoint mesh & cut it about 1/4" larger to frame the schoolhouse a little. She covered the die with some papers & inside the little oval frame of the schoolhouse is a stamped bird image (Tim Holtz) surrounded by pearls, butterflies & bird eggs.
At the bottom, she hung a couple of great little charms (7 Gypsies, I think).

Another fabulous creation don't'cha think?? She is so GREAT at thinking outside the box with all the fabulous dies from Creative Cuts & More! Who would have ever thought of using this schoolhouse as a birdhouse but my uber-talented sister!! So, take a look at all the dies that CC&M has to offer & see what amazing things you can do too!

Be sure to keep checking in to see what our other talented designers are up to all week & we'll be back next Friday with another "Outside the Box" creation using the fabulous products from CC&M!!
Here's a little sneak peek:
Designer: Kim Langhorst

Tuesday, April 5, 2011

Birthday Bear Gift Set

Hi all!!!

I'm a little late with my post today as I just returned from a four day trip with my son to go visit a college he is interested in. We had a great trip!

He's too old for cute little birthday sets like the one I am sharing with you today but I am hoping it will inspire you the next time you have a birthday gift for a little guy!


I made the gift box out of the Tall Gable Box cut out of Walnut Brown Bazzill Canvas cardtock.

The card is a circle window A2 card. The card base was cut from Walnut Brown Bazzill Canvas cardstock and the mat was cut from Neenah Cream Smooth cardstock.

Here's a close up view of the card.

The stamps are by High Hopes Stamps and you can get more details on my blog!

I hope you enjoyed my little boy gift set today!

Have a great rest of the week!

Kristine

Saturday, April 2, 2011

Want To Share My Daughter's Album I Made Her

 Hi !Dawn here today,
I wanted to share the album I put together to give my daughter for her birthday this last week.

I started with Flower Window 6" x 6" Album from the Creative Cuts and More store. Isn't this a beautiful color?
Those yummy flowers are  Flower #06-Set and I ordered  several : in the same color as the album, acetate, and white felt.

 Wanted to share a few views of the inside pages.
I used several dies from many companies to cut out mats for each of the pages.
The pages are empty because I wanted her to add her own pictures and memorabilia.
I used Butterflies of different sizes for the page tabs.

 I used white ribbon to tie the pages together.
If you prefer rings -you can now purchase various sizes in the store here.

I used a few shades of purple chalk to color the butterflies and a couple of the acetate flowers.
I had some soft purple pearls in my stash I added to the flower centers.
I chose to add a trellis frame in white behind the opening to give a peek to the patterned paper behind.


So glad I could share my album with you today- make sure you go to the Creative Cuts and More store to check out all the albums and supplies available.

Friday, April 1, 2011

Hello Cupcake Rectangle Die Cut Card

Happy Friday!!!

I hope your are going to cut some time to play with paper this weekend!!!

I have a fun card to share to day that I made with a Creative Cuts & More Rectangle Window die cut card. It comes with the big rectangle all ready cut out. I put the stamped image of Patty behind the window and then decorated the front of the card.


Here's a close up!

Stamps:
Stamps by In Style Stamps
Paper:
Rectangle Window die cut card by Creative Cuts & More
Neenah White
Bazzill pink cardstock
Ink:
Memento Tuxedo Die Ink
Prisma colored pencils
Other:
Spellbinders dies
EK Success punches

Thanks for stopping by! I hope you have a great weekend!

Kristine

Monday, March 28, 2011

Monkey Monday


Happy Monday!!!

So glad you stopped by to visit today!!! If you stop by often then you know that I just
love this little Square Bag #01 Large! I started my project with one in Bazzill Romance Canvas Textured Cardstock and decorated it with stamps from Stampendous!


This little bag is the perfect size for a small gift, a gift card, or any little surprise you want to give someone.


Stamps:
Changito's Love Balloon by Stampendous!
Orchid Greetings by Stampendous!
Paper:
Square Bag #01 Large from CC & M in Bazzill Romance Canvas
Bazzill Cardstock
Neenah white cardstock
Ink:
Memento Tuxedo Black dye ink
Copic Markers
Other:
pop dots
American Crafts brads

I always keep some of these die cut bags on hand so I always have a great way to present my presents!!

Hope your week is off to a terrific start!

Kristine

Friday, March 25, 2011

Happy Birthday Girlfriend!

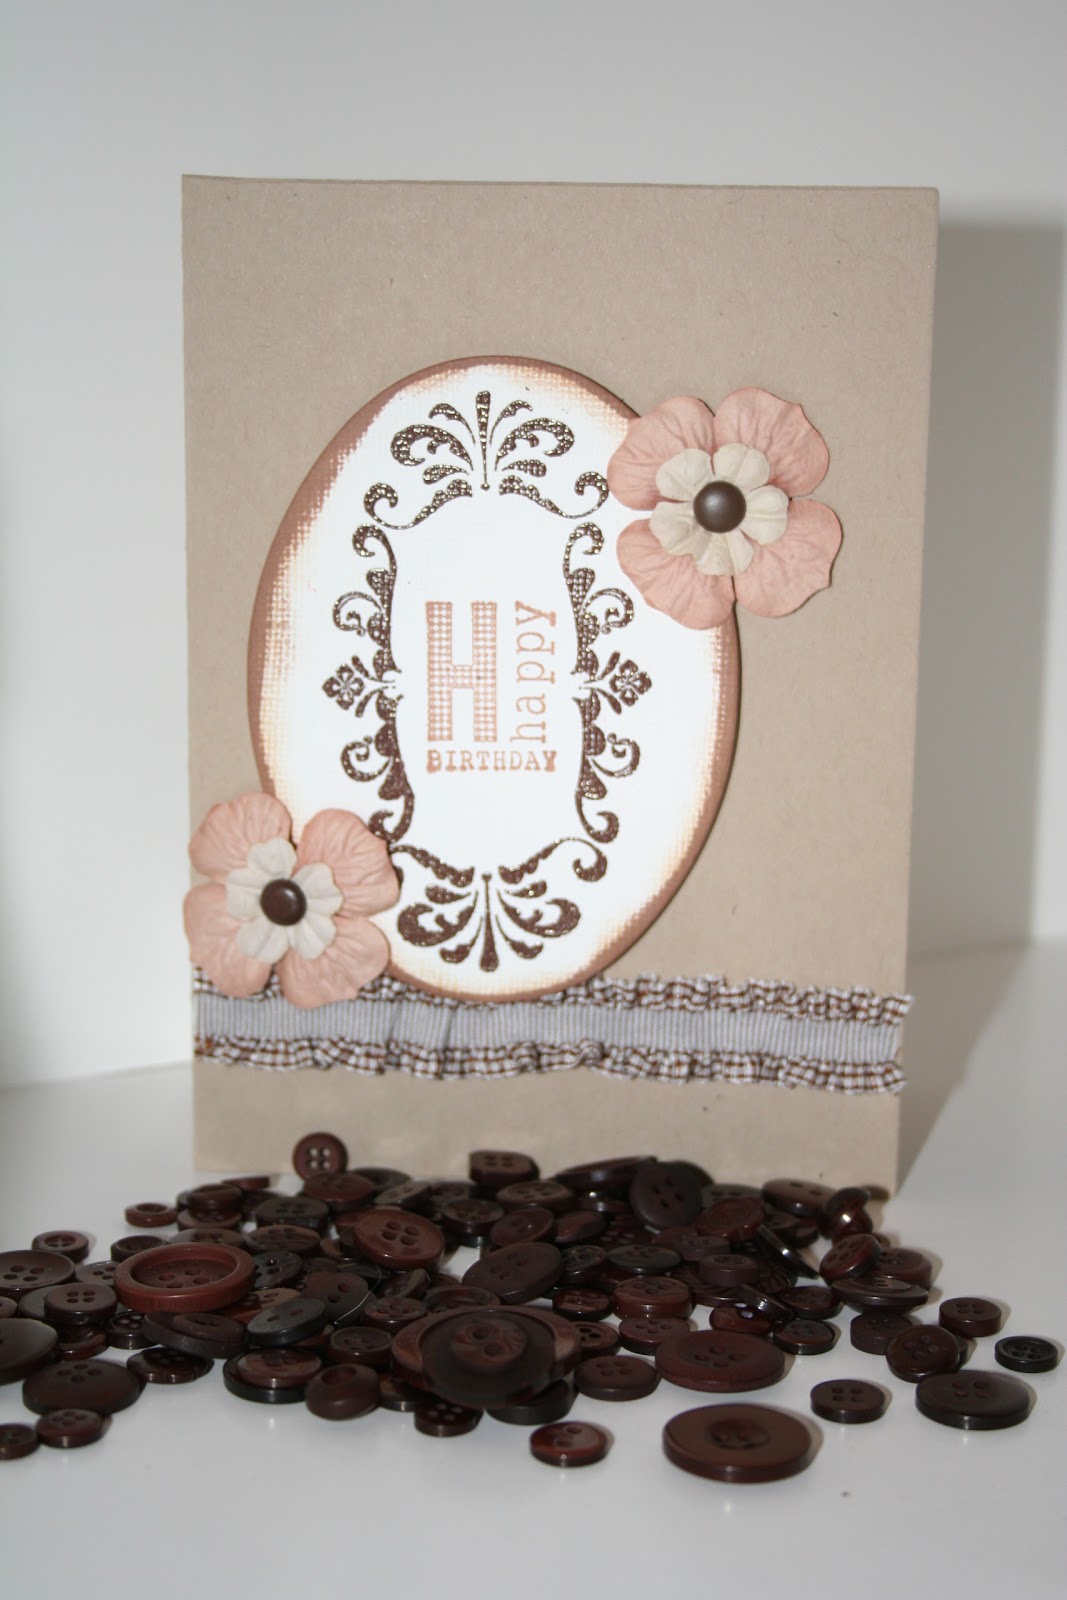
I made this card for our very own Becky one of our super amazing DT members!  I love the A7 cards they are bigger and give you lots of room to work with!  The oval is a sneak peak of what's coming soon!  Be sure to check out our New Products section of the website often!  Terry is always adding new products.  There are so many things coming.  She just added a ton of  new albums!
I used two {ippity} sets to make this.  The frame is from Regal Greetings and the sentiment is from Life's Little Moments.  The flowers are Prima and the brads are from my stash.  The ribbon is my new all time favorite!  I got it at Hobby Lobby!  It always seems to be 50% off and comes in a lot of great colors!  I used Killer White Tear-able Tape to attach everything.  I LOVE this tape!  It is so cheap and there is so much of it!  I have been using my roll since October!
Thanks for stopping by today! 

Tuesday, March 22, 2011

It's going to be a "Banner" Spring!

Hello there!
Becky here, blogging for my sister Kim (as usual! LOL!)!
She just finished this BEAUTIFUL banner using the Banner Die from Creative Cuts & More in a GORGEOUS Aqua Lagoon Stardream Fuse Metallic paper!

She said that she was inspired by a similar banner in this book: "Delight in the Details" by Lisa Pace. Here's a bunch of close-ups for you to admire...
Don't just love all the little touches!
Here's a couple more close-ups of one of the banner pieces:

Isn't she just so darn clever!!
It looks absolutely beautiful on her mantle!
And sooooo very easy to work with when the banner pieces are pre-cut for you from CC&M!! There are tons of great colors to choose from & other dies that you can pick-out to embellish your banner too! Hop onto the shop & browse around!!

That's it for today!
See you soon!
designer: Kim Langhorst