Saturday, April 30, 2011

Time for Tea!

Hi everyone! It's Taylor here, with my very first post on the Die Cut Diva blog! Today I've made a Gatefold Crescent Card (in Bazzill Classic Smooth) from Creative Cuts & More. I love that the whole card comes cut and scored - I just had to make it my own! And this brand new stamp set from Sweet 'n Sassy Stamps was just perfect for this card.


Inside the card, I stamped the large sentiment, two small flowers, and used the "steam" as swirls on either side.
On the outside of the card, I added an Antique Label (in Neenah Smooth), sponged the edges, and stamped the teapot on patterned paper. I love the fun pattern paired with the Kraft. The band just slides off, and the card opens up. My husband is fascinated, lol!

Thanks for stopping by - have a great day!

Thursday, April 28, 2011

A Great Gift Idea!

Hi, it's Nora Anne posting today! When my cousin asked me to donate a handmade item to the gift auction for her Theatre Club, I immediately thought of using this kraft Card Portfolio and making a set of matching note cards. I made 3 notecards so far and plan on making 3 more, the six A2 size cards with envelopes will fit perfectly in the pockets and I think I'll even go a little crazy and decorate the inside flaps to match the notecards!
I may be ordering some more of these for year end teacher gifts too! I just love how quick and easy it is to make a great handmade economical gift! of course, Creative Cuts and More has them in every color you can imagine and I'm sure the notecards would come in handy for anyone.
Thanks for stopping by today!


Wednesday, April 27, 2011

Did you know Creative Cuts is even for organizing?

It's true!  I have made the Tag Album before and it's super cute!  But lately I am using it to divide my stamps!  I should be committed for cataloging my stamps!   If you would like to see more on that you can HERE.
I am filing them all alphabetically and decided to use the Tag Album as my dividers!
At first I was going to stamp all the names.  Well.... let me just tell you a little hint.  You can't see that when it is between the stamps LOL 
I labeled the top and it does stick out above most of the stamp sets. 
I'm not sure why I am stamping on them.  I guess because I love to stamp so much!  LOL  I love these as dividers and they will make me happy every time I pull out a stamp set!
So remember, we can help you get organized, help with party decorations, cards, scrapbook pages and lots of other things!  :)
Thanks for stopping by today!

Tuesday, April 26, 2011

So sorry this post didn't make it up early this morning...I have been super sick for almost 2 weeks now & even though I have all the photos done for several posts, I just haven't had the energy to blog them! This one will be short & simple! Thanks for your patience! - Becky

So, here is Kim's latest creation for Creative Cuts & More, using the Sliding Pop-Up Card. Kim ordered the card in red & white & then covered the top with some great Graphic 45 paper. This card is really fun to work with & always a delight to receive...
That's it for today!
Be sure to check out the new & amazing assortments of movement cards & dies for all your spring projects at Creative Cuts & More!!

designer: Kim Langhorst

Monday, April 25, 2011

Want A Slice of Cake ?

Hello Everyone, Dawn ll here again
I decided to play around with just a couple ideas for favors to use for Baby Showers.
What better place to get my cake slices x- large from then Creative Cuts and More?


Had to share a few different views of this adorable Pink version.
I used some supplies from Hobby Lobby:
pink baby rattle
pink Prima flower
pink bead trim
That yummy white ribbon is from Really Reasonable Ribbon and is one of my favorite.
Do you notice that I used a few of my handmade flowers again?


For this blue version I used some more yummy ribbon from Really Reasonable Ribbon.
I dug through my stash of buttons to use as accents.

So aren't these the cutest ideas to use at a baby shower?
Remember you can find lots of ideas for party favors at Creative Cuts and More.


Friday, April 22, 2011

Color Block...Fun!

Hi, Dawn LUSK here! LOL, did you know there are two
"Dawn L's" on the team?!! Funny!

I'm sharing this Color Block A2 Mat card, Bazzill Blue Jean Criss Cross cardstock, from Creative Cuts and More ... the work is done for you, all you have to do is create!! How cool is that!


I lightly traced the blocks with pencil, then put some sticky notes down to mask the blocks before stamping.
I used 2 stamp sets and a total of 6 stamps for this card! I have a tutorial on my blog how to do clouds.
Also, see how to do different colors on a silhouette stamp on my blog.
Killer White Tear-able Tape makes it so easy to adhere the mat to the base!

I hope I've inspired you to try one of these fun Color Blocks!

Thanks for stopping!
Dawn Lusk

Thursday, April 21, 2011

Easter Egg Hunt


Happy Easter Week! It's Nora Anne here today and I am sharing a layout from Easter season 2009, not bad, only 2 years ago!
This Scallop Circle is the perfect addition to any layout and Creative Cuts and More has it in SO MANY colors and types of cardstock! You can stamp on it, like I did, or leave it blank, cut it in half for a 2 page spread, emboss on it, ink it, the possibilities are endless!!!
If you haven't been by the store lately, you have to check out the new assortments! They are to "die" for!
Enough of my corny jokes! I'll see you right here next Thursday!
Happy Spring!

Wednesday, April 20, 2011

A fun little recipe album!

Hi everyone!  It's Noelle posting today!
A girl I know and love asked me to email her some of our favorite recipes.  She and her Fiance are sick of the dinners they keep making over and over!
I mostly used Basic Grey's Nook & Pantry line to decorate with. 
I can't email recipes!  That's not who I am.  So I whipped out this fun little recipe book in one night!  I ordered the House Mini Album Page I got 4 chipboard and 2 acetate.  There was room for 8 of our favorite dinners!
I have 2 SU! sets for recipes albums and I love them both!  This particular one, i found at the second hand store for $4.00.  I try not to squeal out loud when I score like this but occasionaly it slips out!  :) 
That cute cow is from an {ippity} set I LOVE, called Simply Home
I have seen Shayna eat my lasagna before so I knew this page didn't need much to encourage her to try it LOL  I used some twine and that's it!   
The cute chicken is actually an epoxy sticker by Creative Imaginations. 
Thanks so much for stopping by today!

Tuesday, April 19, 2011

6" x 6" Spring Mini Album

Hi everyone, Fern here, and I want to show you what I've been working on. It's a Spring Mini Album for my Mother for Mother's Day. I will be adding photos of my three little grand babies, her great grand babies. She lives in another state and doesn't get to see them too often, so I think she will be very excited to get this... And since it takes me sooo long to do one of these, I decided to share a few pages with you.. I hope you like what I've done so far.....
I used 2 of the Heavy Chipboard 6" x 6" Album Covers from Creative Cuts and More, one for the front and one for the back.. These are already cut to size, holes punched and scored for you.. all you have to do is decorate them... The first thing I did was cover the chipboard with the Creative Cuts and More beautiful Fairway - Fuse Stardream Metallic Cardstock.. After that I started going through my scraps and here's what I came up with.

This is the inside of the cover page
The little photo book will hold 12 photos and 6 tags!!


Here you can see the same page without the little photo album... The little butterfly, flower and ladybugs are from a little girls hair barrette..

Here are the last two pages...

Three tags for three grand babies...


Tags pulled out.....


And here's the back side...

I hope you enjoyed looking at my Spring Mini Album.. And, just maybe I've inspired you to make your own mini album?!! All you have to do is go to Creative Cuts and More, check out their Album Kits and/or their individual pieces and build your own...
They are so fun to decorate and they make wonderful gifts!!
Thanks for dropping by!!

Monday, April 18, 2011

Sweet Treats For You

Hi Everyone Dawn ll here today to share a quick project
I had made some of these cute Peek-A-View Box containers to share with my mother and her room-mate at the assisted living home and forgot to post them sooner.
My mom likes pink like I do, her room mate really loves blue so those were perfect just for them.

 Just click any of the pictures to see the details if you would like to see them better
This is my real favorite - I added some of my favorite flowers from my stash and a quick border to accent.
 This purple /pink version has some Webster Pages fabric flowers. I added a couple from my stash and a few pearls.Used some soft ribbon from CTMH that seemed to work well with this container.
The cupcake small on the front is a die cut in the store I decorated with liquid applique in pink and heat embossed. The colors added were done with H20's

 This simple one is just some yummy ribbon from Really Reasonable Ribbon and a flower I made with a few buttons- got this great button idea from Becca Feeken.
Remember to stop over to the Creative Cuts and More store and check out the new items being added every week. You can also use
CC&M11DawnLoth for a 10% discount

Sunday, April 17, 2011

Peacock Portfolio

Happy Sunday!!!

I hope you are having a terrific weekend so far. I have a fun card set to share with you today.


I started with a Card Portfolio from Creative Cuts & More and then filled it with four matching cards and envelopes for an easy thoughtful gift.


Here is the Card Portfolio all closed up:


Here's how it looks when you untie the bow and open it up:


Here is a close up view of one of the cards:


And...here's the whole set:


Stamps: Peacock Feather by Stampendous Deam Text by Stampendous Paper: Bazzill Prismatic Cardstock (Baby Blue Dark & Black) Neenah White Cardstock Card Portfolio die cut from Creative Cuts & More Ink: Memento Tuxedo Black dye ink by Tsukineko Versamark Watermark ink by Tsukineko Copic Marker (BG04) Other: EP111-R Midnight Black Embossing Powder Silver Brads Dots & Dashes polka dot ribbon


The card portfolio comes all ready cut out from Creative Cuts & More so you just need to put it together. Add the ribbon and decorate the front as if it is the front of one of the cards. This is a quick and simple gift perfect for that someone special in your life!


Thanks for stopping by!


Kristine

Friday, April 15, 2011

Is This Spectacular or What? (heavy in pics)

Wedding season is a time when love is in the air- May I share some inspiration with you?
Hi Everyone, Dawn ll here today.
I have to say I think this turned out so Well -hope you like.
Creative Cuts and More has the most spectacular die cuts and the Cake Slice Box Set- Two Tier is one of my favorite to use.
I love the dies from Terry because they are perfectly cut and always the highest quality. I get to choose from hundreds of paper colors and weights or materials.
I see patterns on-line that can be cut out by myself but so not worth a poor quality product for something I want to last and look spectacular.


This Cake Slice Box Set- Two Tier cake (die cuts)was actually made for Terry in opalescent white metallic and I used Amethyst accessories.

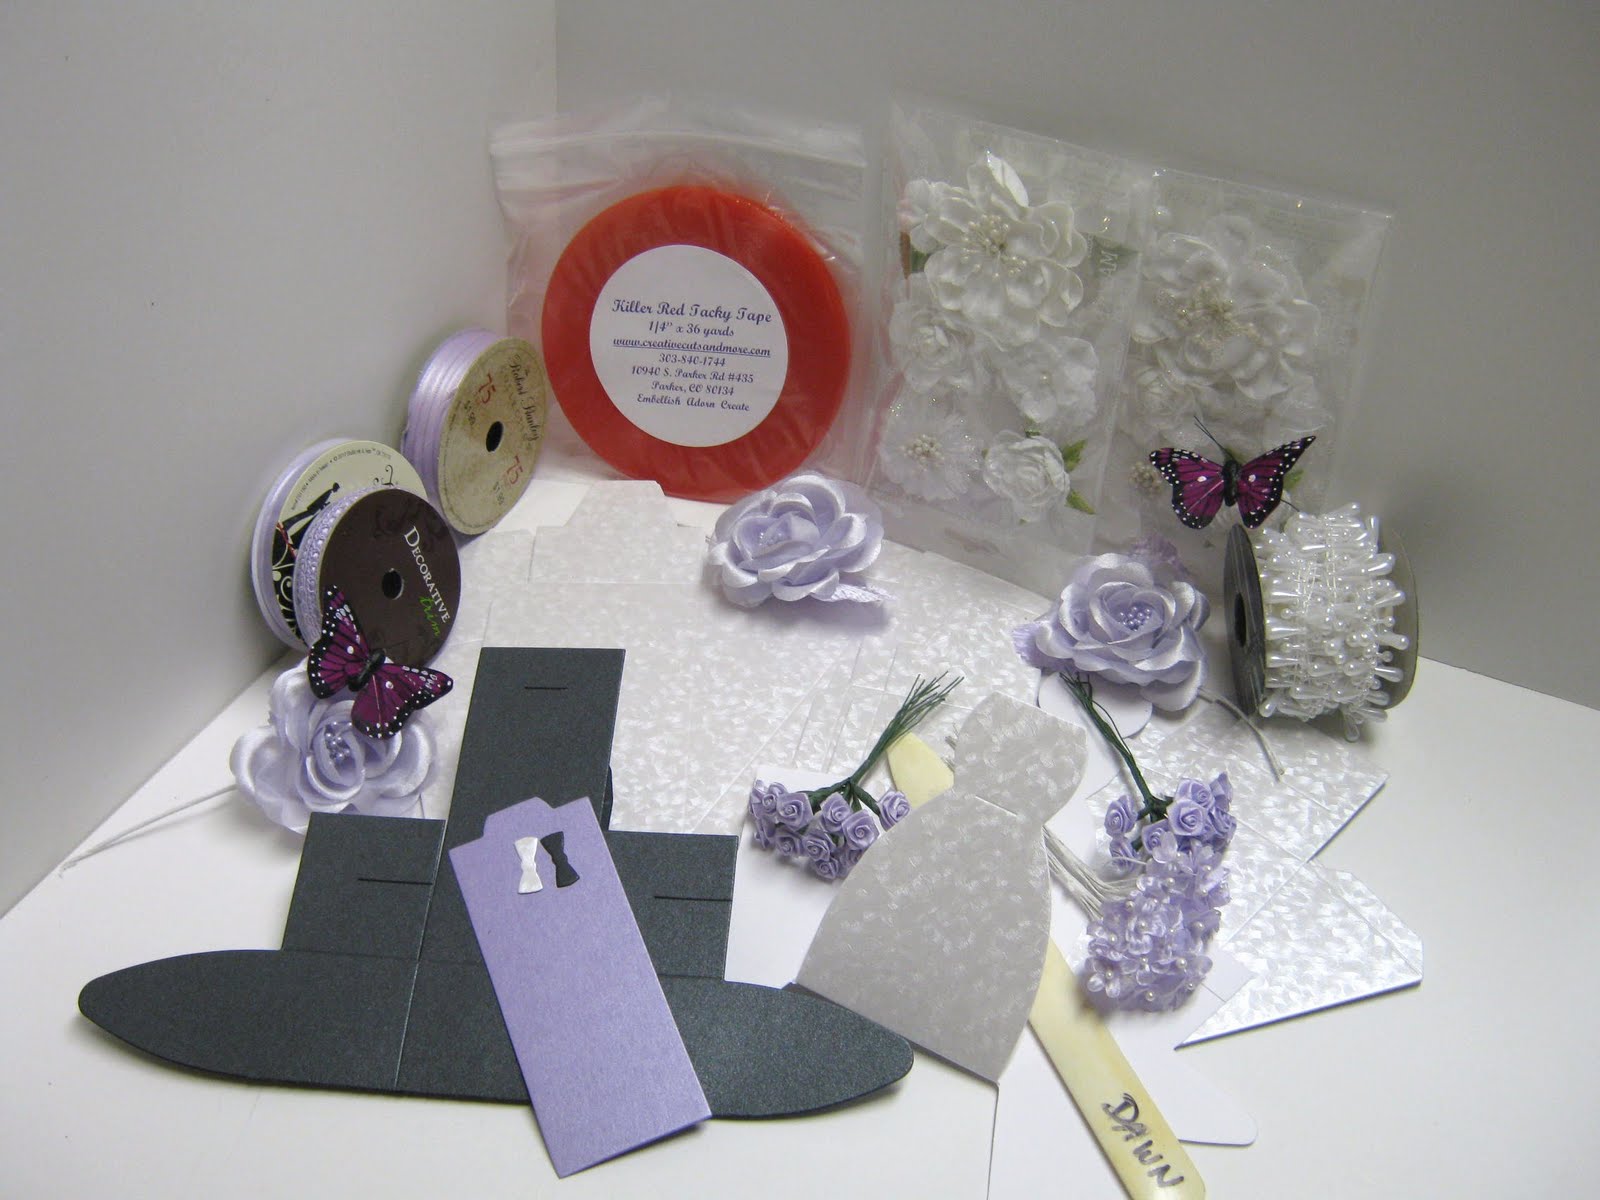
Here is the basic supplies I started with to create this wonderful cake.

Let me share some steps to construct one of your own
You may also contact Terry at Creative Cuts and More to purchase the supplies and have me construct and decorate for you in your choice of colors.

I chose to use a cardboard cake form as a base. Killer red Tacky tape works best for this cake because I used metallic papers and I wanted it to stay together.I personally like to use a bone folder to make all the folds crisp, but it isn't necessary if you choose not to use one
White tissue paper works well to stuff the inside to help keep the form of each slice and not add weight to the cake.


Wanted to share a close up of the tape areas to help keep the slices together forever.


The larger size slices get placed on the bottom first and placed closely together to give the top layer the support it will need after fully decorated.
This is a quick view of the two tiers together undecorated.
These are the supplies used to decorate and assemble the Dress and Tuxedo Box Set.


The Dress & Tuxedo set come as a separate set and the suit, dress, shirt and tie can be made in any color choice you would like.
Each of these pieces can also be purchased separately.

I used Tulle that was dotted to accent the dress- sort of a thin liner so the pearl shine on the dress shows through.

Decorating the Two Tier Cake is the best part of this process. I started with the teardrop pearl and braided trim around the middle of each layer.
The bride and groom were added to the middle of the top of the cake at a slight angle to make room for decorations.
I was lucky to find these beautiful open flowers in a Amethyst shade to match the grooms shirt and tie.
I even added a small flower to the lapel and around the waist of the bridal dress


I had to add a couple butterflies to this Spring like two tier cake.
Many of these items can be purchased individually if you would like to check them out.

Cake Slice Box - XL

Cake Slice Box - Large

Cake Slice Box Set-Two Tier

Please let me know what you think- I am always excited to hear if you like what I have shared or not.
Please pop over and visit Creative Cuts and More and let Terry know I sent you.

If you use my code CC&M11DawnLoth you will get a 10% discount.